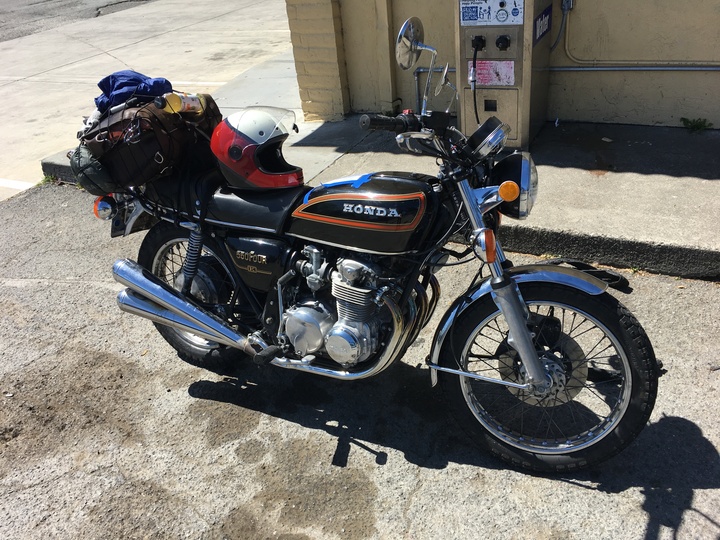
Mine
Kyle E. Mitchell of Oakland, California owns the black 1978 Honda CB550K4 with VIN CB550K2107565, registered in California.
If someone else tries to sell the bike, let me know. I will ruin their day. And make yours.
Modifications
I love the CB550 as it rolled off the showroom floor. I’ve modified mine only for function, to keep the bike on the road and me on the bike.
Master Cylinder
I use the master cylinder from a CB750 Nighthawk with a braided-steel line straight to the stock caliper. It looks the part—though not as spiffy as the shiny, round original—and accepts the original rear-view mirror. It’s a massive improvement.
The Nighthawk master cylinder has a modern ALPS switch that you can wire in as a direct replacement for the stock pressure switch. The stock hydraulic Y-fitting between the master cylinder and the caliper can go.
These changes happened only thanks to Tyler and Anton at Hayasa Motorbikes in Oakland. We tried a couple of master cylinders before landing on this one for my particular bike, and apparently that’s normal. If you want good brake feel with the power to lock the front wheel, give Tyler a call.
LED Headlight
I use a Truck-Lite model 27270C 7” LED headlamp. It draws a great deal less, and makes bright light. It sits right in the headlight bucket with the stock retaining ring, and plugs right into the harness where the old bulb did.
The LED unit protrudes about an inch from the chrome retention ring that holds the unit in the bucket. From a distance, it still looks classic, but at any close range, it’s obviously a modern-day upgrade.
Even with the LED, the headlight is a relatively big draw. I installed a cheap, handlebar-mount toggle switch to the right of the turn signal switch. As long as the switch is easy to use and rated for the maximum amperage of the light, it’s fine.
Turn-Signal Buzzer Removed
The stock turn signals are wired to a buzzer that sounds like a dump truck in reverse. I found that it actually discouraged me from signaling turns.
Fortunately, you can just unplug it. I wrapped the resulting mateless bullet connector with a small length of heatshrink tubing, just to keep it from touching anything else in the headlight bucket.
Dyna S Ignition
This is a standard upgrade. It immediately improved my bike’s idle. I found it pretty easy to install, thanks to the excellent provided instructions.
Thanks again to Tyler at Hayasa for pointing me directly to the Dyna S among all the available aftermarket Hall effect kits. The Dyna S is probably the best upgrade kit of any that I’ve seen for old Hondas. Good instructions. All parts included. Even a spiffy box.
Fuel Filter
The stock petcock has a strainer, but I don’t trust it. I spliced a standard, clear-plastic, funnel-shaped inline filter into the line between petcock and carb fuel rail. I’ve had no flow problems. A little peace of mind.
4-into-1 Exhaust
My stock 4-into-4 pipes are usable, but pretty well rusted out, which is typical for these bikes at this age. I replaced mine with headers, a collector, and a straight slip-on from Delkevic for an astoundingly low price, delivered. Installation was easy, and the results have been great. The only downside of the kit is the flat-metal, ring-like header pipe collars, which look out of place, and a little strange. It’s not possible to get the Delkevic collars off, or the stock, flanged collars on, without cutting.
Restorations
Keeping things looking the same on a bike this old takes doing.
Seat Cover
I recovered the seat with a replacement from the eBay seller gumtwo. They did a great job matching the stitching, and the material seems robust. They have patterns for specific years of CB550s seats, including the dual-contour CB550K4 seat.
Installation was time-consuming but straightforward with the “plastic bag” trick described in the provided instructions. Be careful with the pins that hold the seat to the pan; they’re liable to snap when re-bent after straightening. Be sure the seam of the seat is underneath the pan before punching holes. Best case, none of the seam shows above the pan when you mount the recovered seat.
Pointers
Side Covers
The plastic side covers are old and brittle. Taking them off makes everybody nervous.
A bit of silicone lubricant spray on the rubber grommets helps them back on, but the effect wears off quick. A little grease inside the grommets lasts longer, but eventually goes, too. You can soften the grommets longer-term by dunking in a solution of methyl salicylate (oil of wintergreen) and 99% isopropyl alcohol. Give them a day or two.
If you primarily pull the right-side cover for battery access, install a battery tender lead and run the SAE connector under the seat and out the back of the bike. You can check voltage at the connector. Deltran even sells a pocket-sized voltmeter with a green/yellow/red go/maybe/no-go indicator.
Brake Squeal
Treatable, but not curable, with the stock, one-pot caliper.
A bit of heavy-duty grease between the moving break pad and the caliper seems to help. For a while. So does deglazing the rotor. For a while.
Charging System
I’ve seen no reason to condemn the bike’s charging system, as many seem eager to do. I’ve boiled substantial water off the battery on long freeway rides in overdrive.
I have also killed the battery plodding along at or near idle for too long, especially splitting lanes in heavy traffic. Per the shop manual, the electrical system should break even around 2,000 RPM, well above 1,000 RPM target idle, and then with only 2.4 amps net flowing back at the battery positive. Anecdotally, it seems to happen a bit higher, toward 3,000 RPM.
Power-wise and electricity-wise, the bike wants to rev. Rev it. To make sure I do, I’ve installed a cheap, handlebar-mounted, switchable voltmeter across the battery. I turn it one whenever I find myself plodding along between stopped cars.
Spark Plug Socket
The spark plug wells are very narrow and deep. It’s definitely worth looking after the puller that came with the bike, if you have it.
Otherwise, DPS 60-2970 works alright. Motion Pro’s 08-0175 fits 1 and 4, but not 2 or 3.
Air Box Boot Patching
There’s a single part number for the air box and its boots: 17310-404-670 (CHAMBER COMP.). Some aftermarket suppliers sell replacement boots in kits.
But it’s possible to seal cracks and splits by wrapping in heat-shrink tubing. I used 50mm diameter, 2:1 ratio tube, and a cheap heat gun on the low setting.
Slow Jets
The slow jets in the PD46C carburetors were pressed in, not threaded. This is annoying, but not insurmountable.
Slip a piece of vinyl tubing over the jet, or wrap it with a strip of rubber gasket sheet. Then grip it with a set of pliers or vice grips and pull straight out. Twist very slightly if necessary, but don't rock side to side.
Parts
Cables
| Throttle (Pull) | Motion Pro 02-0155 |
|---|---|
| Throttle (Push) | Motion Pro 02-0156 |
| Clutch | Motion Pro 02-0005 |
Bearings
| Front | All Balls 22-41307 |
|---|---|
| Rear | All Balls 22-51361 |
Jets
| Main Fuel | Size 90 — Brian Barnes, Dave Voss |
|---|---|
| Main Fuel Needles | E2349 — Dave Voss |
| Main Air | Size 130 — Brian Barnes, Size 120 — Dave Voss |
| Idle/Slow Fuel | Keihin 3L (press fit, 28mm long, 5mm maximum diameter, 3mm minimum diameter), Stock Size: 42 — Dave Voss |
| Idle/Slow Air | Size 150 — Brian Barnes, Dave Voss |
| Needles | E2349F — Brian Barnes, Dave Voss |
Oil
3.4 US quarts / 3.2 liters 10W40 or 15W-40 diesel motor oil, not synthetic, 2-3 oz zinc additive — Common Motor
10W-40 or 20W-50 — shop manual page 13, section 17
Check the oil level without screwing the dipstick in. — shop manual page 13, section 7
Battery
Yuasa YB12A-A
Settings
Float Height
12.5 millimeters
…for the 1978 CB550K with PD46C carburetors, set the floats to 12.5mm, as measured from the tip of the flat part of the float, to the carburetor bowl surface. This float setting was published in a supplement, rather than in the shop manual or the owners manual. The engine should still start and run if the floats are set at 14.5mm, but the higher 12.5mm level allows the fuel to be drawn upward into the throats a bit easier, and since these carburetors tend to run lean anyway, a lower than ideal fuel level can cause issues.
Jet Needle Setting
Second Groove — Dave Voss, SOH4.net forum post